
- Home
- Cooking
- Roasting
- Frying
- Stir Frying
- Braising
- Steaming
- Baking
- Marinating
- Grilling
- Candy Making
- Deep-Frying
- En Papillote
- Curing
- Glaze
- Skewers and Kebabs
- Infusion
- Juicing
- Gravies and Sauces
- Making Pasta
- Outdoor Cooking
- Poaching
- Reduction
- Sautéing
- Soups and Broths
- Preserving Methods
- Fondue Methods
- Pané Methods
- Making Stocks
- Making Bread
- Griddling Methods
- Savoury Bakes
- Stews
- Making Salads
- About Cooking Crashes
- My Man's Cooking
- Patés and Terrines
- Roasting Meat
- Gardening
- Recipes
- Cakes and Bakes
- Fish
- Desserts
- Soups
- Stir Fry
- Meat
- Starters
- Snacks
- Smoothies
- Brunch
- Savoury Pies
- Vegetarian
- Salads
- Pasta
- Rice Dishes
- Picnic
- Stews
- Jams and Chutneys
- Burgers and Meatballs, Vegballs and Fishballs.
- Festive Recipes
- Sides
- Breakfast
- Pizza and Tartiflette
- Lunch
- BBQ and Grill
- Savoury Bakes and Gratins.
- Fondues
- Raclettes
- Leftover Recipes
- Sauces, Vinaigrettes, Dressings and Dips
- My Recipes
- Seasonal
- Tips
- Ingredients
- Cheese
- Fruits
- Vegetables
- Meat
- Fish
- Eggs
- Breads and Bakes
- Spices
- Herbs
- Sauces, Pastes and Stocks.
- Nuts
- Dairy
- Condiment
- Seaweeds
- Baking Ingredients
- Seeds
- Pastas and Noodles
- Pastries and Batters
- Shellfish and Seafood
- Oils, Vinegars and Cooking Fats
- Leaves
- Preserved Food
- Snacks
- Stuffing and Mincemeat
- Edible Succulents
- Edible Flowers
- Tofu
- The Unusual Delicacies.
- Honey
- Rice
- Sommelier
- Pets
- Wildlife
- News
- Reviews
- About
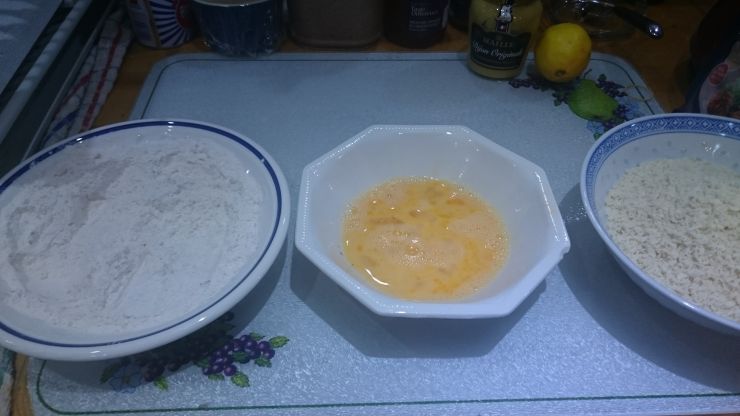
To Pané somthing means only to cover it with breadcrumbs or else. However there is a methodical method about it all which can differ from one person you talk about it to another. So it is fair to say that the rules are not fixed like a Eulogy on a grave stone, they can be adapted or evolve or remain. The choice is up to what suits you best.
It usually consists of three essential parts:
First it is to cover your ingredient to be pané with flour. Second you dip your Meat, Fish or Veg in lightly whisked eggs. This step is crucial to ensure that the next coating will stick to your ingredients. Thirdly and finaly you envelop your ingedient in a coat thick or thin evenly of crumbs.
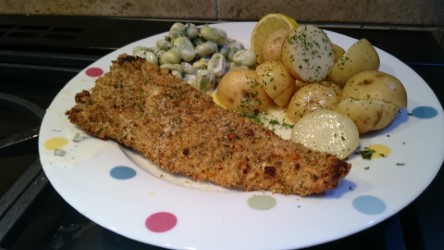
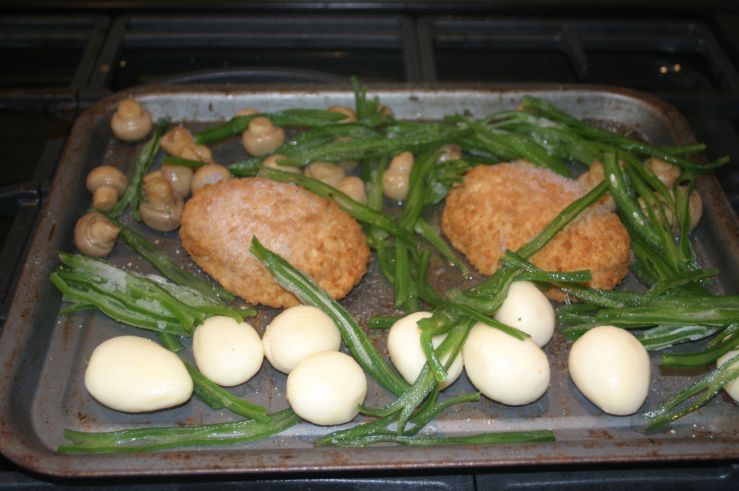
Pané Trout fillet with baby potatoes and broad beans.
The Pané process can either make sure that the Meat, Fish or Veg stay moist underneath the coating or, in the oppsite if you want a very crisp and well done dish give it that feel especially if you deep fry the items afterwards. The result depends on the amount of time you leave it in the oil or any fat agent but also the temperature of it.

Veal Schnitzels.
For a tip I can only advise to any of you to invest in an essiental kitchen gadget: a temperature probe. Not only it tells you the right temperature reached by your fat element, or for sugar, jam setting it is extremelly useful, but also it helps you to know when your food did reach the correct temperature to be fully cooked and safely served. For the little anecdote which is in fact a sheer stupidity of mine, trust me when I say to not use your finger to test the temperature of something. Abestos fingers is just a figure of speach and do not exist: it is just at tall tale and a myth which a lots of cooks loves to brag about.
Home Made Fish Fingers.
In my case one day I was preparing Caramel, one of the favourite things of my partner. It was my first time doing some. So of course I was a bit anxious, you know the what if I mess it up and I have a hard time to clean a pan afterwards... Anyhow what didn't help was the curious and constantly hovering partner who wanted his Caramel done to perfection and very much, so he was constantly pestering if the Caramel was the right colour and so on or if it was done. By impatience, I told him it was perfect but to prove it, I made the schoolboy error to put my finger in the mixture, and oh boy, oh boy, did it hurt and burn. I ended up jumping about in the kitchen to go to the sink swearing like a French sailor. Words I would not repeat here. But trust me when I say a temperature probe can be regarded as a safety tool in the kitchen just like a fire alarm is.
Going back to our Pané methods, the first step is the flour. Here you have two consideration to take. One is the type of flour to use. Test, taste and trial: the three Ts is the way to go. To be honest there, I mainly use plain white wheat Flour mainly by convenience but also to season it to my taste. Sometimes I use Self raising white Wheat Flour, for the extra puff it can give in the end result. Or you can add a little tea spoon of baking powder for the same result with the Plain White Flour.
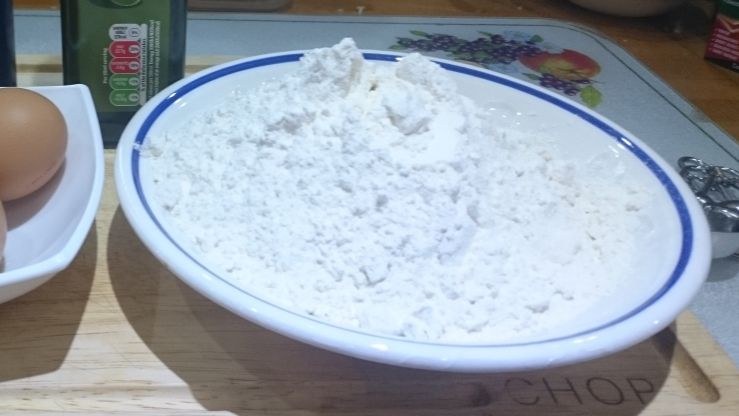
Plain White Flour.
For added texture you have all sort of Flours to choose from: Buckwheat, Oatmeal, Rye, Rice flour and cormeal Flour.
In my humble recommendation, I would advice for whole meal Flour, Buckwheat or Rye Flours if you aim to do a Schnitzel. Rice flour is nice to coat Fish, Prawns, Vegetables to be use in an Asian way. While Cornmeal Flour add a 'Je ne sais quoi' to Sourthern USA and South American dishes: Yummy and Crispy.
Then it is true that you can let the Flour be just that something to protect the ingedient before the other two steps. However a little seasonning at this step of the process doesn't hurt for one bit, it helps to give flavour to the bite you will take later. Salt and pepper and even finely chopped parsley, does't hurt a Chicken Cordon Bleu or even a Chicken Kiev, let me tell you that. At the end of the day it is all about adding flavour. The Flouring stage is perfect to do it. Be yourself, creative, and remember we always learn by our mistakes.
Home Made Chicken Kiev with Runner beans but with very pale baby potatoes.
I can recommend the use of white pepper, of Cayenne pepper (a pinch) and for the Salt smoked crushed Sea Salt. There are Salts with Umami flavours like Nori or Kelp within them which are worth trying with a dish involving Fish, and also you can create crushed home made Garlic Salt to use in the flour, which is perfect for a Chicken Kiev. Choosing your own seasoning is key and not every seasoning goes to every dish so we are back to the 3 Ts.
The next step I will say is the messy one. You must dip your ingredients in an egg bath. This is however a swimming pool of yellow goodness which makes the link from one end to the other. This is the matrimonial link of a perfect Pané. So to refer to Roald Dahl, you must unsure that your egg is not a Bad Egg like Veruca Salt...
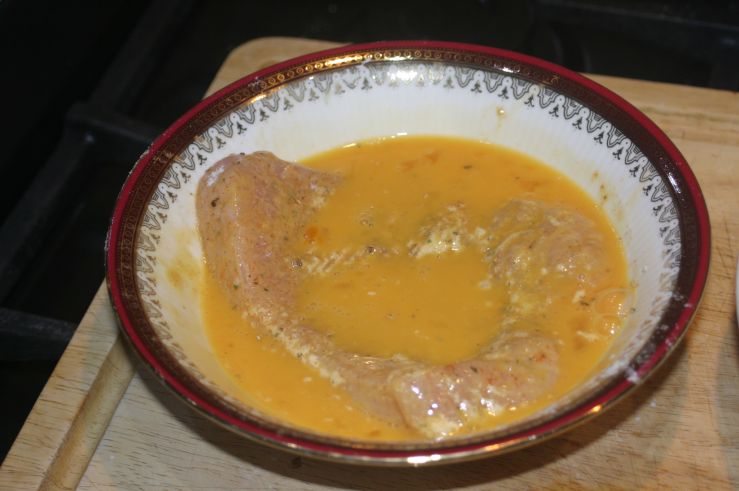
Bathing in the seasoned yolks. (Turkey Flattened Breast)
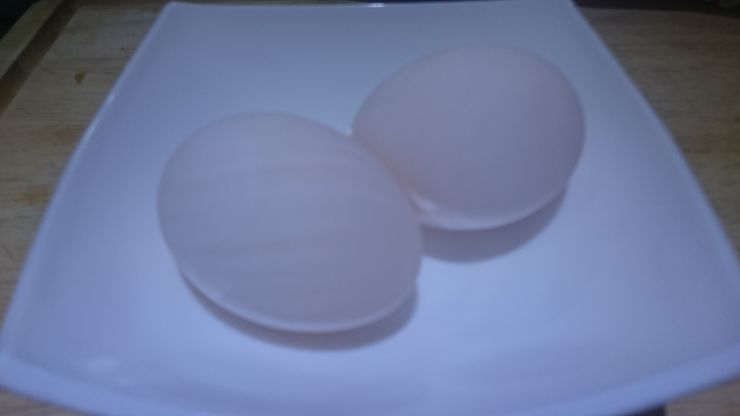
Like the Flour, you can choose your egg and its type. Fresh will be a good idea and of course a smelly one will be a bad idea. A simple tip is to put an egg in a glass of water, if it sinks to the bottom it is fresh, if it floats, it developped air pockets within it which means it is an old egg.
For Pané I will certainly not recommand a little quail egg however they can make nice little Scotch cocktail eggs. But fresh free range chicken eggs are my classical go to for using in a pané. Just whisk them lightly and you will have your binding agent. Duck eggs are rich with bigger yolks and are a mighty good option as well. However they have less white which can cause less covering of your overall end up product. So we can say more is less and less is more in that case. More yolk or more white this is the question because we aim for flavour and a very even covering.
Duck Eggs, very rich and nice, massive yolks but not a lot of white.
Speaking about flavour, you can also put some seasoning in this part of the process. I would say just a little salt and pepper would do the trick. It all depends on how much seasonning you did put in the first flouring stage on that matter. However I will say that chopped herbs at that stage tends to stick better to the Meat, Fish or Veg. This is because eggs act like a glue. It is a bounding trick. Chopped Chives, Chervil, Parsley, Dill, Coriander, could be added there and then depending on your planned dish. A little whisk around and you have waltzing flavours in that step as well.
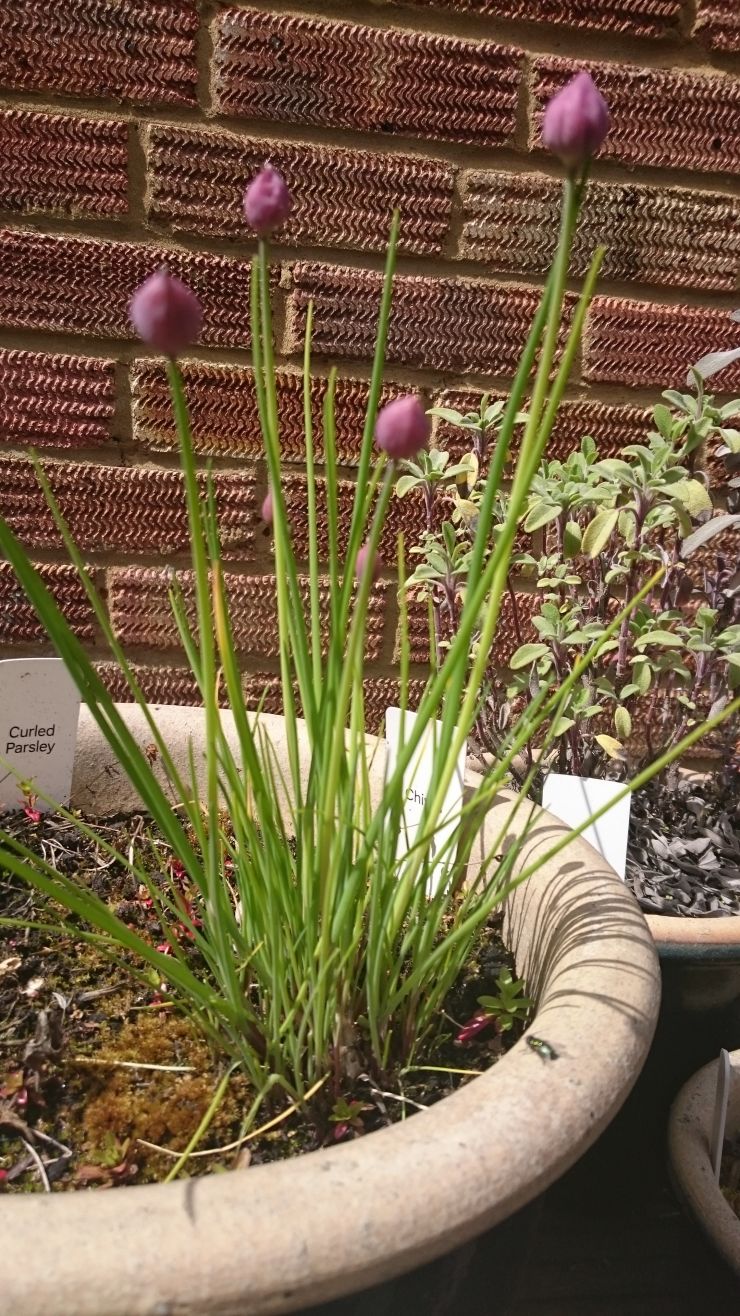
About to flower Chives. Great with battered Fish. Chopped finely.
I am thinking of nice pairing like chopped Sage with Pork, Rosemary with Lamb, Thyme with Chicken, Chives with Meaty Fish, Dill with tender ones, Marjoram with Zucchini, Oregano with Aubergines.
Once the nice unctuous sticky coating is done, it is time to cover your piece with crumbs, thickly or thinly but most certainly evenly. No one wants a coat with a hole in it by fear to be called a pauper. The crumbs coating can be called 'La Créme de la Créme' or the Upper Crust. The same apply for that last step of the process as the other first two: it is all about your own choice.
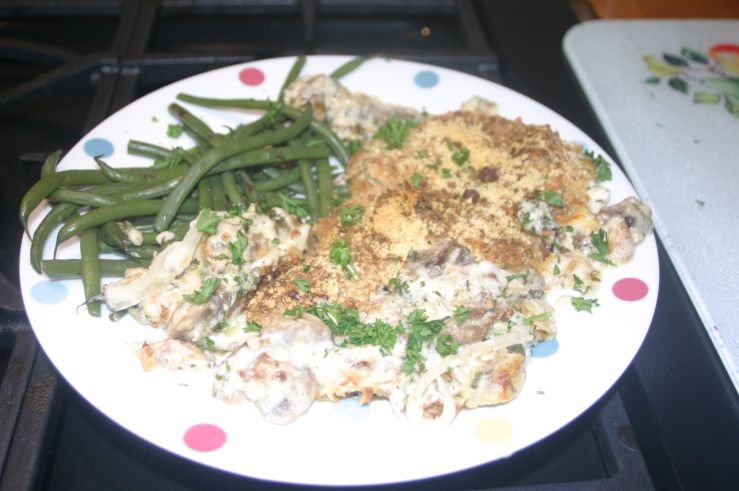
Veal Schnitzel with Green Beans.
You can buy perfectly decent shop bought Crumbs. Golden etc which last long and with a bit of TLC hence seasoning, a pinch of Paprika, or Garlic Granules, or Cayenne Pepper can do the jazz of the dish you have planned.
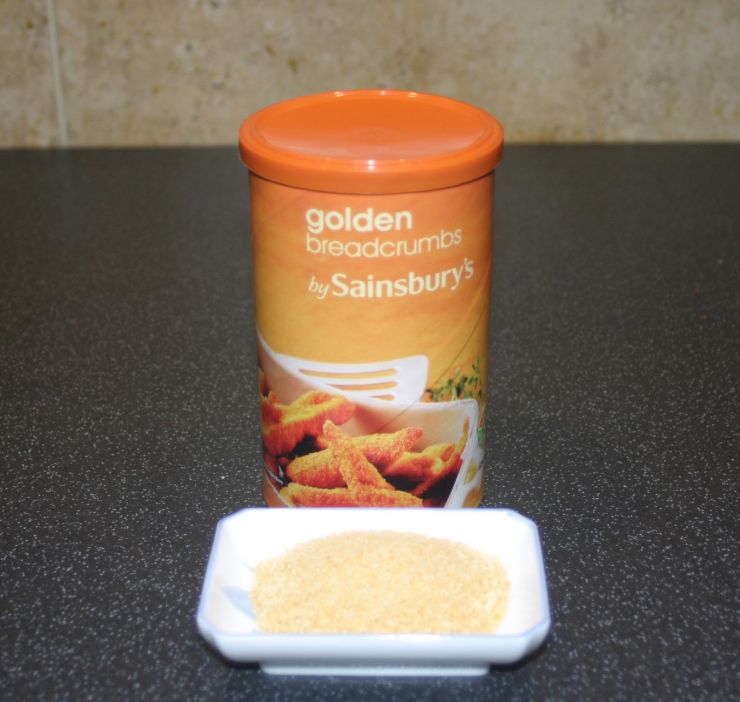
Golden Breadcrumbs.
However I love the ones called Panko Crumbs. They produce a nicely light and crunchy texture around your main ingredient. They are dry. Their consistency is also flakier than the usual breadcrumbs. You do obtain a lovely coverage with them. The result is usely less greasy as well.

Panko Breadcrumbs.
Then of course you can make your own Breadcrumbs. You only need to make or choose your bread. Then if it is a day or two old or you can say that the dryer is the better. But don't let it go rance. Just let it age like a good wine but only for days not for decades. You will need a little blender at the very least in order to transform your bread into crumbs. You can also let your imagination going into a riot of creation, like a Mary Poppins in a Carroussel and let the race horses be all yours and let them loose.
To return to creation of Breadcrumbs, I do like to keep it simple and useful. From a nice loaf of white crusty bread turned into the Crumbs you can make the magic happen by simply adding the Superfragilisticexpialedocious word of all kitchen: Seasoning. A little Salt, a little Black Pepper and Parsley, a little minced Garlic, Chives, and a Star Jar of Breadcrumbs is created to go very well with Fish, Chicken, Turkey and Veg.
https://www.youtube.com/watch?v=4M1XC00RMA8
Now you can go the spicy way and add Cayenne pepper or and dried Chilli. Zest as well lime works well. It does add a little Zing.
Or you can go to the sunny shores of the Med with the zest of Sicilian Lemon, Black Pepper, Salt, Paprika, or, and very sun dried tomatoes. Si this is la Casa of la MaMa, we have pané Red Mullet fillets with a Ratatouille...
Anyhow, homemade Breadcrumbs are easy to do and to jar up. So you can use them whenever you need to, the lifetime you are looking for to store the Crumbs is about two weeks in a pantry, two months in a fridge and six in a freezer. They are handy tasty treats to have at home.
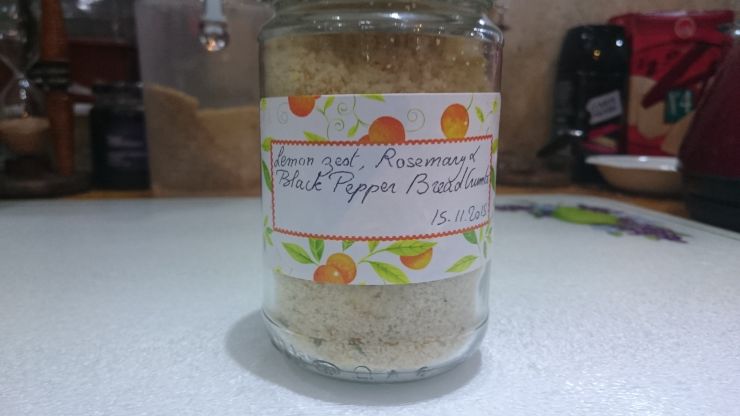
Homemade Breadcrumbs, a very handy way to have fancy ones in the pantry.
Coming to the handling part of it all, doing some Pané food can be a little messy and sticky even if the result is worth all the while. But there are multiple tips out and about to get your hands less messy. One are little kitchen gloves which you can wash, or the uncomfortable garden gloves for that mission of doing a 'Pané'. (Do not do that last one at home, it is when messy get messier). Forgetting all gloves, the method I did adopt is to have a bowl of water, usually at room temperature, on the compter during the process. I clean my fingers of any cloggy bits in the bowl, dry the hands on my tea towell an carry on the job at hand. The last method or tip is clever but I am too clumsy to do it.

Panéed Chicken.
The fact is I am left handed so it is my good or bad excuse. So it goes that you keep one hand to handle the coating in the dry ingredients and use the other one for the wet ingredients, hence the egg bath part, then the result is not so messy fingers. I like the concept of it, the theory of it but in practice I feel like a duckling learning to glide like a swan in the water for the first time and realise I am not yet a swan, I am just a duck with two left wings or flippers... But I think this method needs to be treated like an habit which you gain to a T with practice.
https://www.youtube.com/watch?v=Xd2nTXsivHs
My last words will be that the dishes and meals you can get to pané some meat, some fish, some veg is pure pleasure. Who doesn't love a potato croquette?
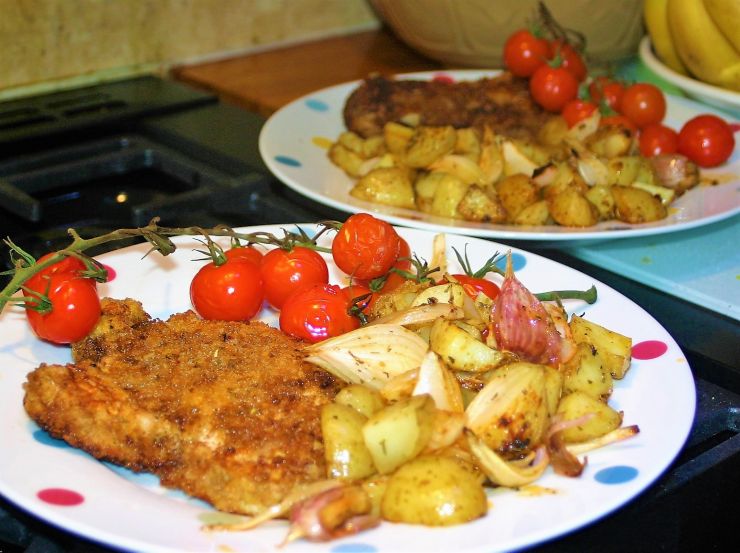
Pané Turkey Scallops with Sautéed Potatoes and Roasted Tomatoes.
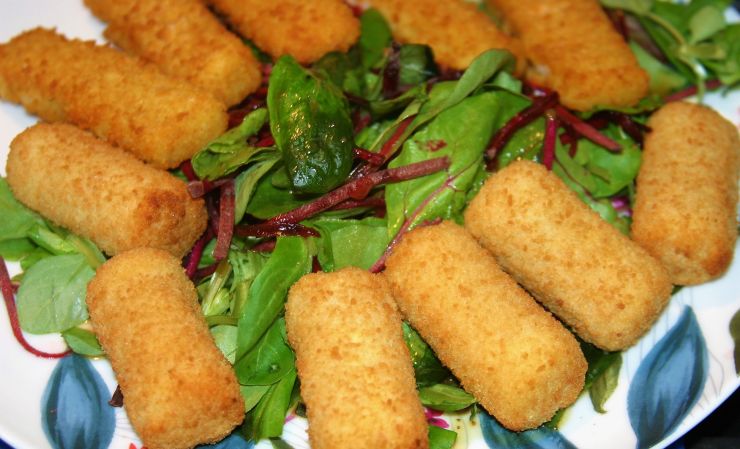
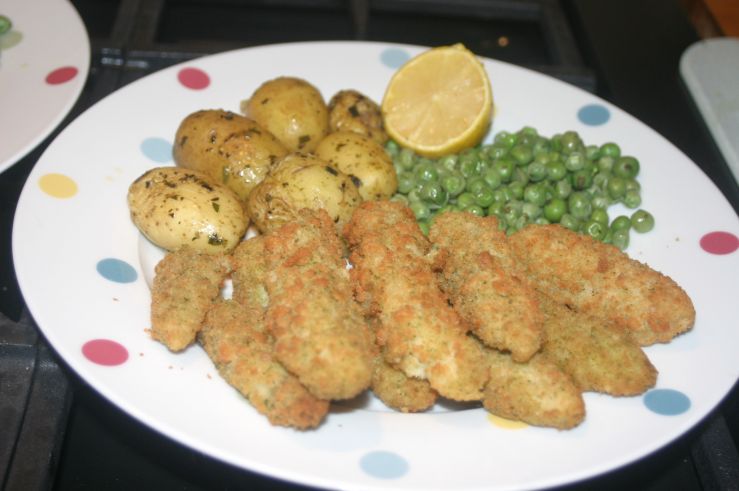
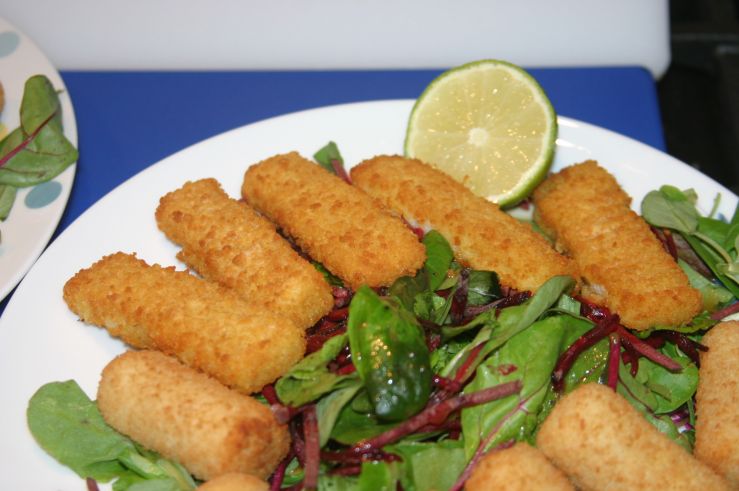
Pané Galora: Fish Fingers and Potato Croquettes upon a Salad bed.
I forgot to mention that Cheese can be panéed just as well to great effect. I love Mozzarella Sticks as an Appetizer.
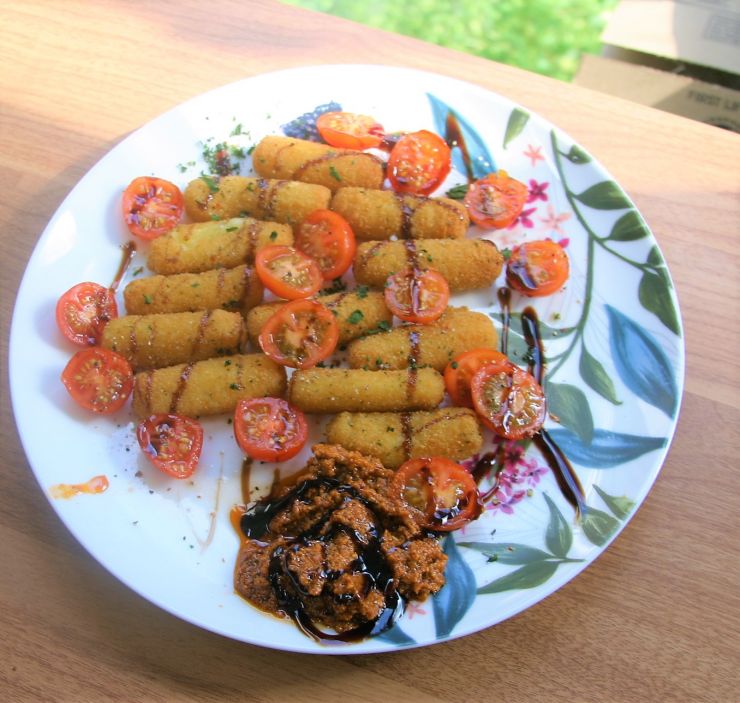
Mozzarella Sticks with Cherry Tomatoes, Sundried Tomato Pesto and a Balsamic drizzle glaze.
There is something else to say about Pané as a method of cooking: it does make a plate attractive from little children to the elderly. Because for example for fish they will know, there will be no bones whatsover in them: fish went through processes which give people trust. A study in Paris done years ago to nusery children showed them drawing little rectangles coloured in yellow or orange when they were asked to draw a fish. It resulted to the decision to take the children of deprived or poor families to see the sea for the first time on holiday and to know that fish wasn't a rectangle but that it had fins and eyes. However confession for confession I do like fish fingers, I do make some myself and find them dead easy to eat.
Fish Fingers... Soft in the inside, crispy a little on the outside, and no bones...
One must say that a Fish and Chips Shop is always very popular and rely mainly on their Fish yes but also on their Batter and how golden their Fish look to the eyes of the consumer however let us not forget the Taste: Crispy on the outside and soft in the middle.
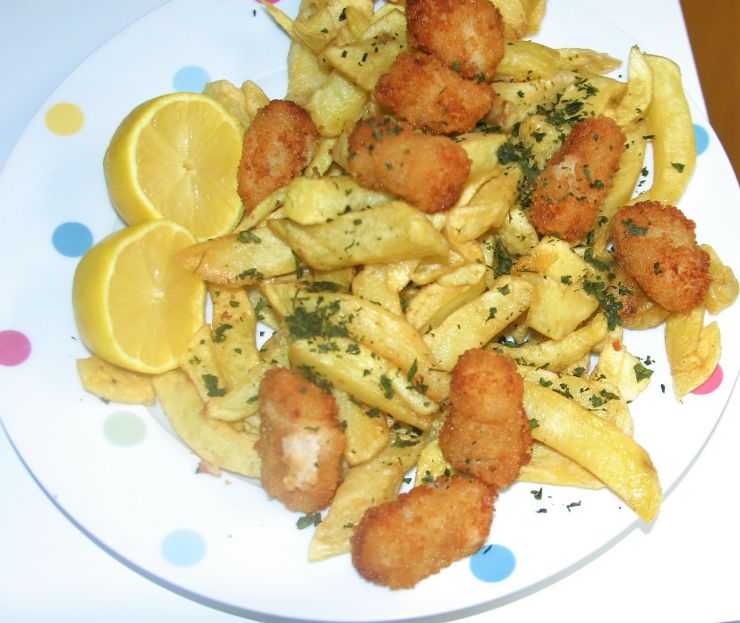
Scampi and Chips.